If you need a homemade mead recipe, here are 5 offering some diversity. Medicinal, traditional, plain, fast or complicated, they can help you get an idea on what you need to make some honey wine. Like with everything else in life, it can be easy or difficult. It depends on what type of mead you want and how perfectionist you are.
So, to make mead at home, we need the following:
Ingredients. Basically, it’s water, honey and yeast. You can add any kind of fruit you like and experiment with it. It’s about your personal taste only. Besides this natural ingredients you can also add some chemical stuff, for acid, yeast nutrient, or clarification. Eg. GO-FERM®, Feremaid®K, Diammonium Phosphate. But if your expectations are not that high, you can go very well without them.
The complicated methods also take care of some important factors (also met in brewing beer) necessary to obtain the perfect mead, like: OG ( which stands for “Original Gravity.” This is the specific gravity of the unfermented wort. The primary contribution to specific gravity is sugar, some of which is fermented into alcohol, and some of which remains in the finished beer/mead to give sweetness and body.) Or FG (Final Gravity, measured after the fermentation is finished).
But I say, vikings didn’t care about OG or FG! So, let’s make common mead and drink like vikings! 🙂
Equipment: There is no need for fancy equipment, you can improvise with what you already have in the chicken, or use a simple, but specially-gathered-for-mead kit. Here is one on Amazon, just to give an idea: Homebrewstuff One Gallon Nano-Meadery Mead Starter Kit.
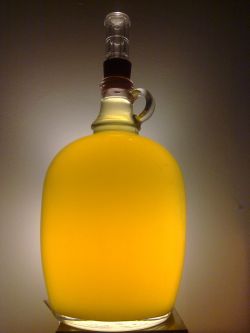
Patience: Yellow mead ferments and ages faster than red mead, which is why it can be drunk anywhere from right after bottling, to 4-8 months of aging.
Compared to sweet mead, dry mead takes longer to finish fermentation, but after that it needs 1 -2 years to age before drinking. You need to be patient.
In ancient cultures, honey was mixed with water and left to ferment with wild yeasts. The natural pollen in the honey supplied the nutrients required by the yeast to multiply and convert the sugars into alcohol. The resulting meads were most likely drunk while still in the fermentation stage and were slightly bubbly.
Recipe No. 1
This is a more traditional type of mead, made with bee pollen. It gives the mead a more therapeutic value, enriching it with valuable nutrients. it is not left to age, it’s not clear, so don’t expect to see a mead like the one you see on a market shelf. Yet, it is more healthy than the bought alcoholic drink.
Ingredients:
- 500 g of honey;
- 100 g of bee pollen
- 2 g of yeast
- spring water
Preparation:
In a 5-liter glass container put the honey and the pollen and complete with spring water. The yeast is added if you want to quicken the process of fermentation, so add 2 g of yeast. The vessel is covered with a cotton towel and left to ferment.
The result is a pleasant tasting drink, sour and acidulated, with low alcohol. After fermentation, the mead is transferred into bottles that will be capped. This is more of a medicinal drink than an alcoholic drink, so it must be kept refrigerated, as the fermentation process continues.
Drink 2-3 glasses of this mead per day, preferably on an empty stomach.
Health benefits of this type of mead:
• cures frigidity (1-2 glasses of mead before intercourse) and relieves impotence (the same treatment as for frigidity),
• reduces the effects of premature menopause (if drinking morning, noon and evening for 60 days),
• helps restore appetite and treats anemia (half glass with 15-20 minutes before meals),
• treats minerals and trace elements deficiency (half a liter a day, for 20 days).
• is beneficial in case of insomnia, hyperexcitability or nervous exhaustion, cold.
Recipe No. 2
This is a very very simple recipe, that can be done without any special equipment, your chicken has them all.
Ingredients:
- 1 Gallon of Spring Water (room temperature, not refrigerated)
- 3 pounds of unprocessed honey
- 1 bag of balloons that are big enough to stretch over the mouth of the spring water jug
- 1 package of (Fleischmann’s) yeast
- twenty-five raisins
- 1 Orange sliced into eighths
- optional 1 or 2 cloves.
 Put the orange slices, honey, raisins, and the yeast into the jug. Pour water over them until it reaches a couple of inches from the top. Cap it and shake it up well. This will aerate the mixture. The yeast really needs lots of oxygen to grow vigorously.
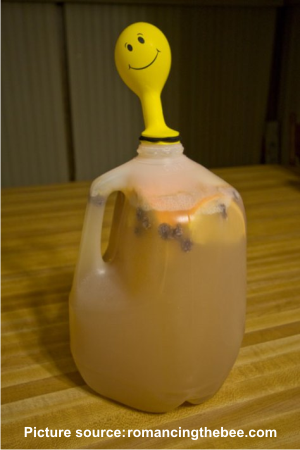
Replace the cap of the jug with a balloon, which was previously pin-holed, so the air can get out. The gases form inside the jug they will inflate the balloon. A rubber band has to be put around the jug’s neck to secure the balloon. In couple of hours the fermentation will start, and the balloon will start to inflate. If it’s getting too big you may need to poke another hole or two in it. You don’t want it to burst.
Set the jug in a cool dry place like a kitchen cabinet or closet shelf. Check on it every day, if you can, just to make sure it is okay and the balloon hasn’t popped off. After two to three weeks, most of the fermentation will be done and the balloon will be limp. At this point your drink is not exactly tasty. But it will be after 3 -4 months!
The orange and the raisins can stay in the mixture for the whole duration. If you want milder mead and help it clarify faster, you can transfer the liquid into another clean gallon jug and place the balloon on that one. This would be after the two to three week fermentation period is over. This process of transferring the mixture into another jug is called racking.
The mead will continue to age and improve over a long period of time, it should stay at least 6 months. Remember that it’s just like with wine: the longer you wait, the better it will get.
Recipe No. 3
- one gallon wine glass jug,
- some bread yeast (or champagne yeast because it starts off with a vigorous fermentation and can allow a pretty high alcohol content)
- a paper towel
- a rubber band to hold the paper towel over the opening of the jug. (If you don’t have rubber stoppers and airlocks).
- local Oregon honey
- an entire canvas bagful of plums
- some raisins (for yeast nutrient)
- juice of a lemon (for acid)
Cut the plums and remove the pits, add the raisins and the juice of a lemon, then simmered this with the honey on low heat. Don’t boil the honey because it destroys the enzymes.
Once this mixture had completely cooled, put the yeast and let this mixture sit in a cool place for a week.
After the fermentation process slows down a bit, filter out the fruit and transfer this embryonic mead to a glass carboy. Then you know what to do: 3 or 4 Rackings per year, bottling and aging. And, finally, happy drinking!
Recipe no. 4
This is a very fast mead that I’ve found on youtube. It uses a lot of chemicals, but it offers an option in case you are terribly hurried. It is not a recipe for beginners. Its secret seems to be the specific 1388 WYeast. It uses a 5 gallon container. You can see the video on youtube for the detailed process.
In a sterilized 2 liter container add the following:
- 1800 ml of Ozarka spring water
- 1/2 cup of Tupelo honey
- 1 tsp of GoFerm (optional)
- 1 activated smack pack of Wyeast 1388
- 1 cross shaped stir bar
Place that container covered, but not air locked, on a stir plate for 3 days. In the 5 gallon carboy add 1 gallon of Tupelo honey, or the tastiest honey you can get, and add 3.5 gallons of water Add 3/4 TBSP K2CO3, 1 TBSP DAP, & 2 TBSP Fermaid K. Use a drill powered mixer to mix honey completely. Also, Dose 1 TBSP DAP + 2 TBSP Fermaid at 2/3 & 1/3 sugar break (I leave a hydrometer in to monitor it daily)
NOTE: If SG was 1.099, 2/3 break would be 1.066 and 1/3 would be 1.033. Stir again to aerate and add starter. Add additional water if needed to fill the 5 gallon carboy.
No water in airlock for 1 week unless you are worried about fruit flies.
Degas daily. I just swirl the hell out of it.
Ferments dry in about a week, and it clears in 3-4 weeks.
Some honeys are stubborn about clearing. If it doesn’t clear, I suggest Superkleer.

Another 1 MONTH recipe, posted on the same youtube page:
1 gallon container
Added Orange Blossom honey to SG of 1.096 in 1 gallon jugs.
Added 3/4 tsp of 1:2 DAP:Fermaid K; also, add this at 2/3 and 1/3 sugar break.
Add 3/4 tsp potassium carbonate.
Shake like hell to aerate.
Pitched Wyeast 1388 – Belgian Strong Ale activated overnight.
Aerate daily by shaking.
Pitching temperature 68 F.
Recipe No. 5
Strawberry-Vanilla Mead
- any local wildflower honey
- over-ripe strawberries as many as you have (When it comes to fresh fruit, there’s no such thing as too many pounds per gallon – bring it on!)
- three fresh vanilla beans
Figs mead
- 2 lbs of fresh figs,
- a meyer lemon (zested and sliced),
- vanilla bean,
- cinnamon sticks,
- nutmeg,
- brown sugar,
- fireweed honey.
Figs are a fairly mild flavor on their own, hence the spices and brown sugar to replicate the dark, sticky-sugar taste of dried figs. At the secondary fermentation, meaning after I racked the mead from bucket to the glass carboy, we an add another pound of fresh figs, to enrich the aroma.
Then follow the same routine.
If you want to use maple or a black currant, a dark buckwheat honey may be the best choice. It’s important how the aroma of the honey and that of the added fruit mix together.
Recommended books from Amazon on how to make mead at home:
• The Compleat Meadmaker : Home Production of Honey Wine From Your First Batch to Award-winning Fruit and Herb Variations by Ken Schramm;
Related articles:
• What is mead wine?
• How to make mead at home!
• Types of mead
References:
Recipe no. 1 curademiere.ro;
Recipe no. 2 romancingthebee.com;
Recipe no. 3 wytchofthenorth.wordpress.com;
Recipe no. 4 youtube.com
Recipe no. 5 sarahannelawless.com
Picture credit:
‘5 gallon carboy’ picture credit Rodrick under CC via flickr.com;
drinking viking picture credit fernando vilches belloni under CC via flickr.com